Firmware Updates
How to Update Firmware on the Kairuhs RC Cockpit Display Kit
Updating your display’s firmware ensures you’re running the latest features and fixes. Follow these steps to safely flash the newest version.
What You’ll Need:
- Your Kairuhs cockpit display board
- A USB-C cable
- A Windows or Mac PC or laptop
- The latest firmware
.binfile (Contact us directly to get it) - NodeMCU PyFlasher (Free flashing tool)
⚠️ Important:
- Use caution with flashing—interrupted firmware installs can brick the board.
Step-by-Step Instructions:
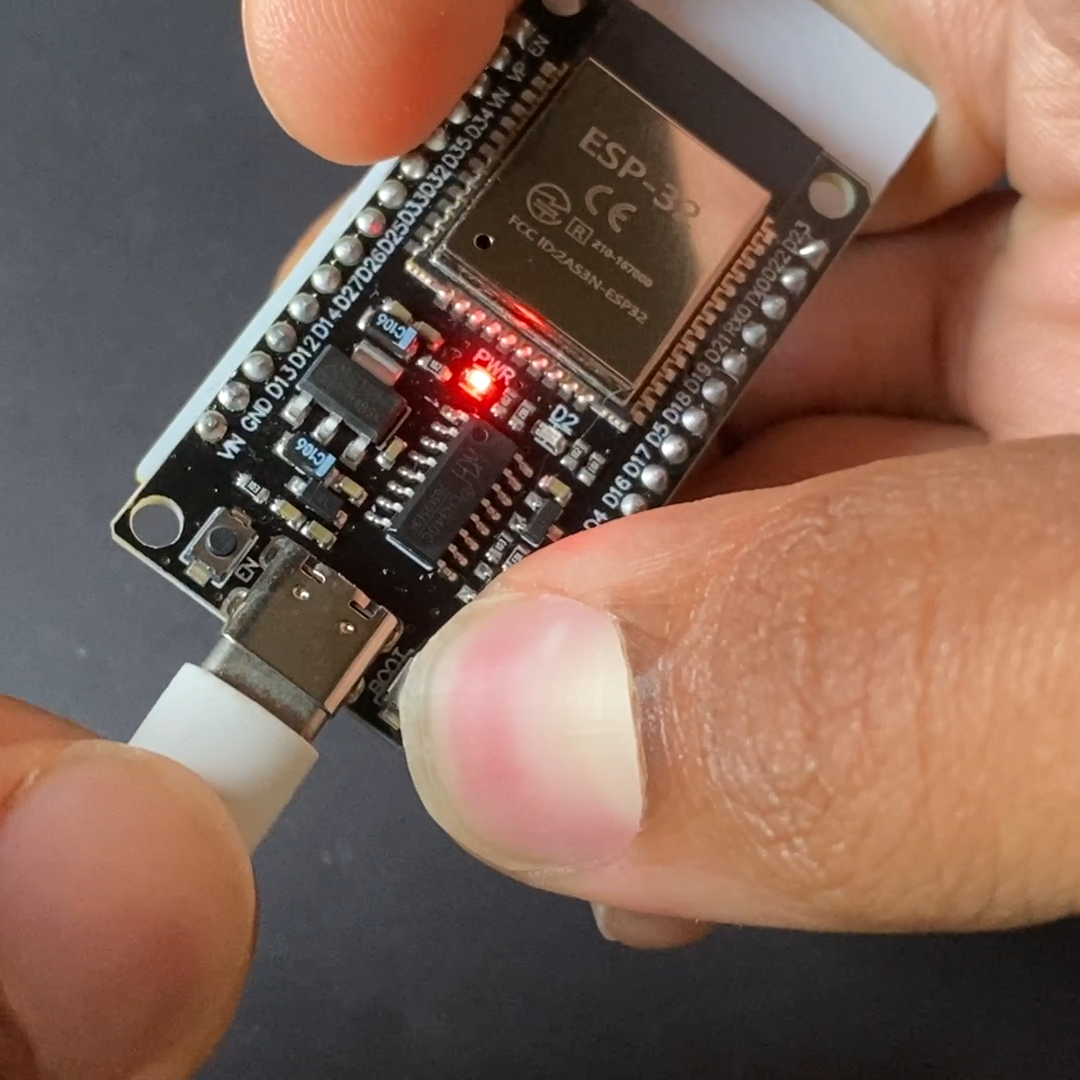
1. Hold BOOT, then Plug In
While holding the BOOT button on the board, connect it to your PC using the USB-C cable.
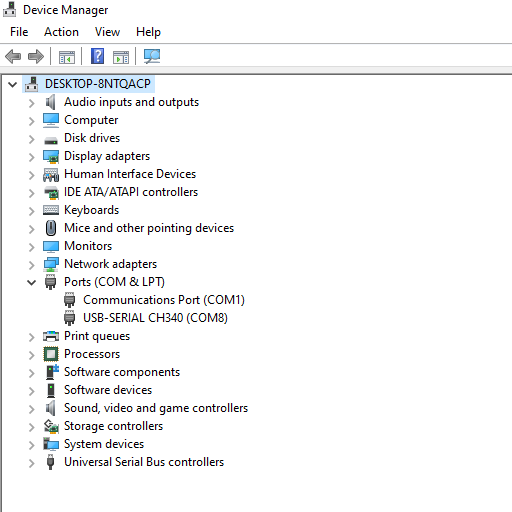
2. Confirm Serial Port
Open Device Manager (Windows) and confirm that a new COM port appears (e.g., COM8).
This means the board is now in serial bootloader mode.
3. Open NodeMCU PyFlasher
Launch the PyFlasher tool and fill in these fields:
- Serial Port: (your board’s COM port, like COM8)
- Baud Rate:
115200 - Firmware: Choose the
.binfile you downloaded - Flash Mode:
DIO - Erase Flash:
yes(recommended for clean update)
Click Flash NodeMCU.
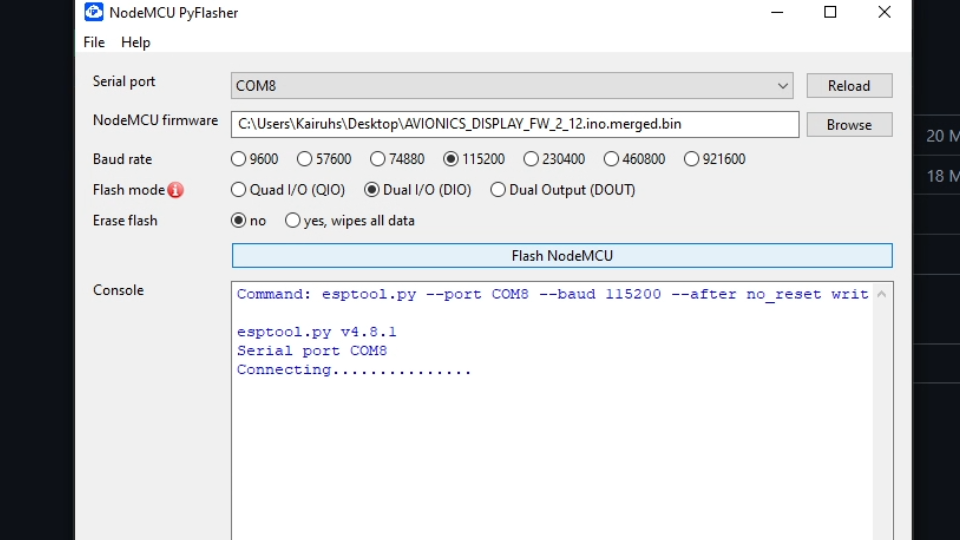
4. Wait for Completion
The flash process will take a little over 1 minute.
Once finished, you’ll see “Done” or “Hard resetting…” in the log.

5. Disconnect and Reboot
Unplug the USB-C, then reconnect to power normally (either via USB or 5V from FC).
Your board will now boot into the updated firmware.
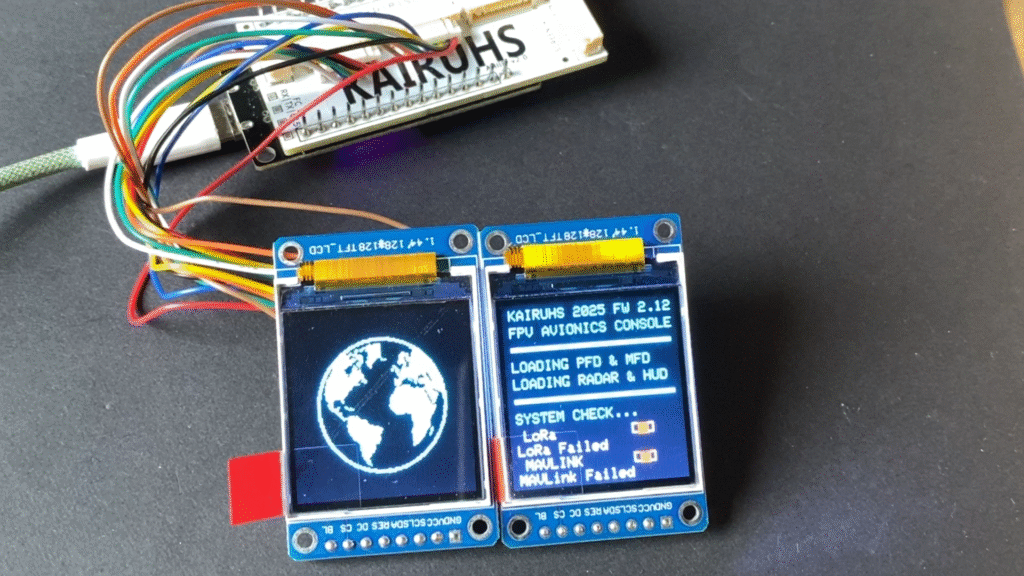
Current Firmware Version
You can check your firmware version by powering on the display. The version number (e.g., v2.12) will appear briefly on boot. If no version appears on boot, it is V1.0.